
Apr 8, 2025
Why Use Zapier for Inbound Workflow Automation?
Automate your business processes by connecting external applications to Approveit using Zapier's powerful integration capabilities. This guide explains how to set up inbound workflow automation that triggers Approveit workflows from any of the 5,000+ applications in Zapier's ecosystem.
Zapier serves as the perfect bridge between Approveit and your existing tech stack, offering several benefits:
No-code solution: Connect applications without writing a single line of code
Wide compatibility: Integrate with 5,000+ applications, including popular CRMs, form builders, and email platforms
Time efficiency: Automate manual processes to save time and reduce errors
Customizable workflows: Build complex automation sequences tailored to your specific business needs
Real-time processing: Trigger Approveit workflows instantly when events occur in other systems
Connecting Zapier to Approveit (Trigger-Based Setup)
Setting up the connection between Zapier and Approveit requires just a few steps:
Click on New workflow or edit an existing one.

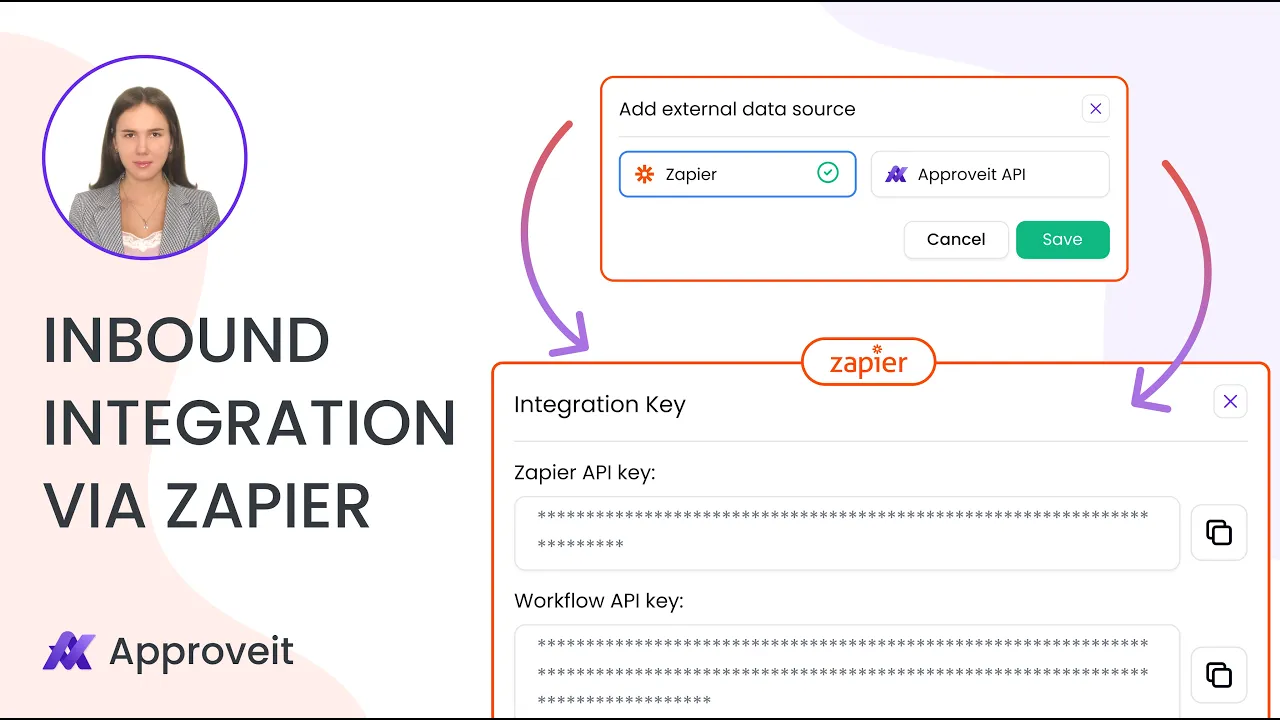
Click on Add external data source.

Click on Zapier.

Click on Save.

Specify the approval flow — click on Add approvers and set up the approval steps.

Save the Workflow.

Creating a Zap to Start Approveit Workflows Automatically
Once connected, you can create Zaps (automated workflows) that trigger Approveit processes:
Create a new Zap in Zapier.

For the first step select the app where the action that should trigger the approval request takes place. For our example, we will select Google Sheets.

Setup the first step.

Configure and Test the first step.

For the second step select Approveit.

You need API key to connect your Approveit account. To get the API key, go to Settings in Approveit.

Click on API Key. Copy the API key and paste it in Zapier.

Paste the API key to connect the Approveit account.

Configure the second step. Set up the data mapping for the request that will be triggered in Approveit.

The Workflow Key can be found in the workflow builder.

Copy the Workflow API Key in Approveit.

Insert the Workflow Key in Zapier.

Test the second step.

Create a new row in the table in Google Sheets.

The approval request is created in Approveit.

Examples of Inbound Triggers from Other Tools
Here are practical examples of how to trigger Approveit workflows from various systems:
Form Submissions (Google Forms, Typeform, JotForm)
Set up a Zap that starts an approval workflow whenever someone submits a form. Perfect for expense requests, time-off applications, or purchase orders.
CRM Activities (Salesforce, HubSpot, Pipedrive)
Trigger Approveit workflows when deals reach certain stages or when new leads meet specific criteria, ensuring proper approval processes for sales activities.
Email Integration (Gmail, Outlook)
Start workflows when emails with specific subjects or from particular senders arrive, ideal for processing vendor communications or customer support escalations.
Project Management (Asana, Trello, Monday.com)
Initiate approval workflows when tasks change status or new projects are created, maintaining governance over project lifecycles.
Document Processing (Google Drive, Dropbox, OneDrive)
Trigger workflows when new documents are uploaded to specific folders, streamlining document review and approval processes.
By connecting Approveit to your existing tools through Zapier, you can create seamless, automated workflow processes that reduce manual intervention and increase efficiency across your organization.
For more detailed information on automating actions after Approveit approvals, check out our guide on How to Automate Actions After Approveit Approvals with Zapier.
If you have any questions or need further assistance, feel free to reach out to our
support team.


